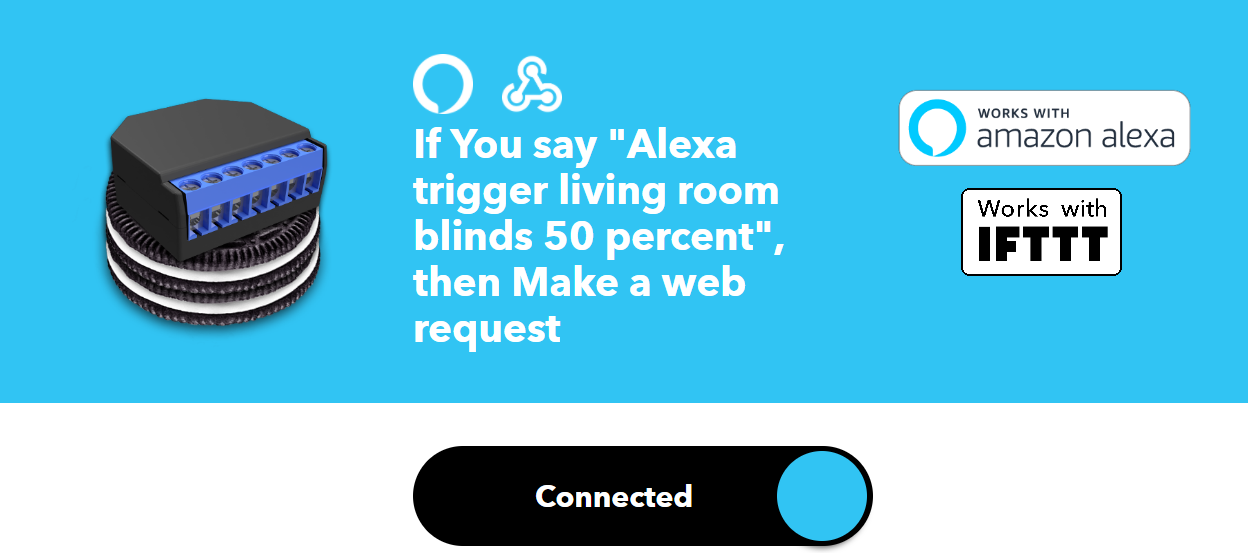
I wanted to play a bit with some Smart Relays so after the successful implementation of my neighbor, I decided to buy 7 Shelly 2.5 for each of my rolling shutters in my flat. They are already motorized, and each room has a wall switch to turn them up or down which also has the possibility to stop the opening or close action in the middle if desired.
I installed all the Shelly’s (I will write about the installation itself in another post), and started playing around with the configuration. You can integrate directly with Amazon Echo devices by just enabling the skill, this will allow you to say: “Alexa, open living room blinds” (or close) and will be able to open them or close them. This of course assuming you called the device “Living Room Blinds”.
The easy faster way (for 1 device)
If you had configured the Alexa Skill, and authorized it your Shelly.cloud account you need to make sure you have allowed your Shelly device to be Cloud Enabled, then you can simply say: “Alexa set living room blinds to 50 percent” this will open or close the shutter to the desired percentage (provided you have properly calibrated them in the Web server “Positioning Control” menu).
Unfortunately this only works for one device, it doesn’t work if you have a group with multiple blinds, for that you need to check below for the IFTTT integration.
I spent quite some time trying to make this work by saying the wrong phrase, “Alexa open living room blinds 50 percent”, and the answer I got was: “Living Room Blinds doesn’t support that”. I hope this blog post helps someone else having the same issue without having to spend so much time researching like I did.
Because I couldn’t make this work “Natively” is when I found the integration with IFTTT to work well too (see below for the longer way). I already use IFTTT for controlling for example several of MyStrom smart plugs I already have, so I thought this should work too.
The longer (but maybe more flexible) way with IFTTT
First you need to have each Shelly enabled for working in the Cloud (you do that on the “Internet & Security” menu and under “Cloud”) on the Web Server of each device, you will need to go to My.shelly.cloud, on the upper right side of the screen (hamburger button) you will find the “User Settings” menu, then click on “Security” and there you can get an “Authorisation Cloud Key” by just clicking on “Get Key“. Take note of that key and don’t share it with anyone. If for some reason you do by changing your account password, you can regenerate your Cloud Key too. Also take note of the Server URL you will be given on this step.
Next I needed to identify which blinds I wanted to control with Alexa to open “just” 50 percent, so you go to the Shelly webserver you want to control, on the Settings area at the bottom you will find the menu “Device ID” Take note of the Mac Address which is the first set of characters you see after “Device ID:”, take note of those too.
OK, so by now you should have the information you will need for the configuration on IFTTT.
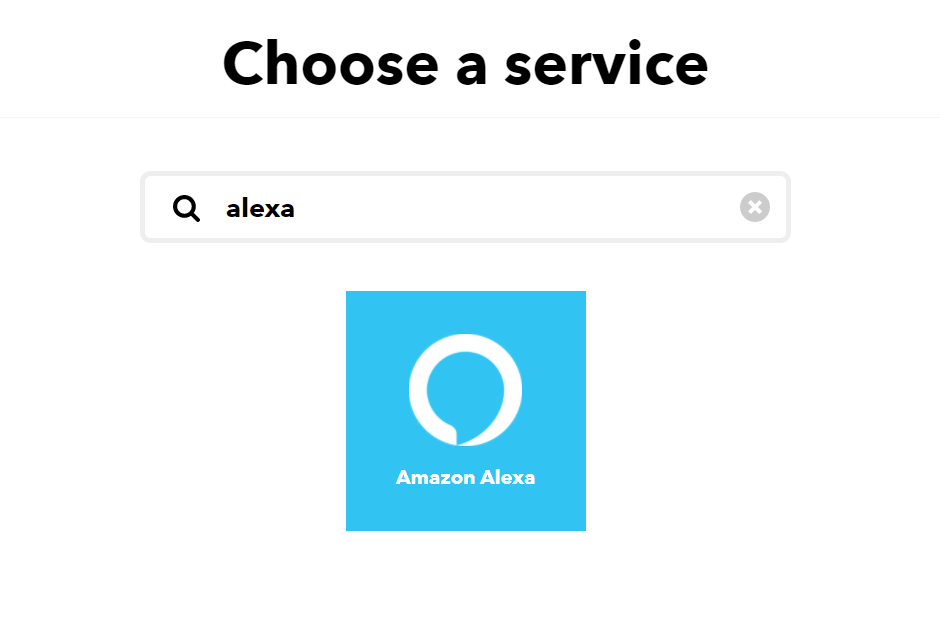
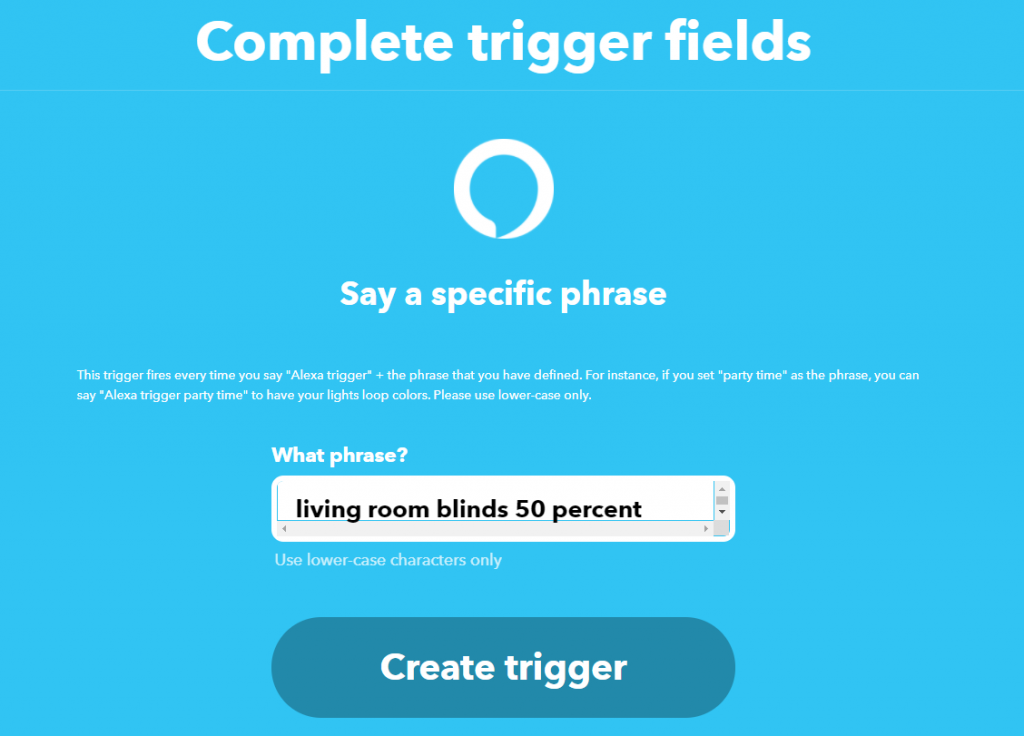
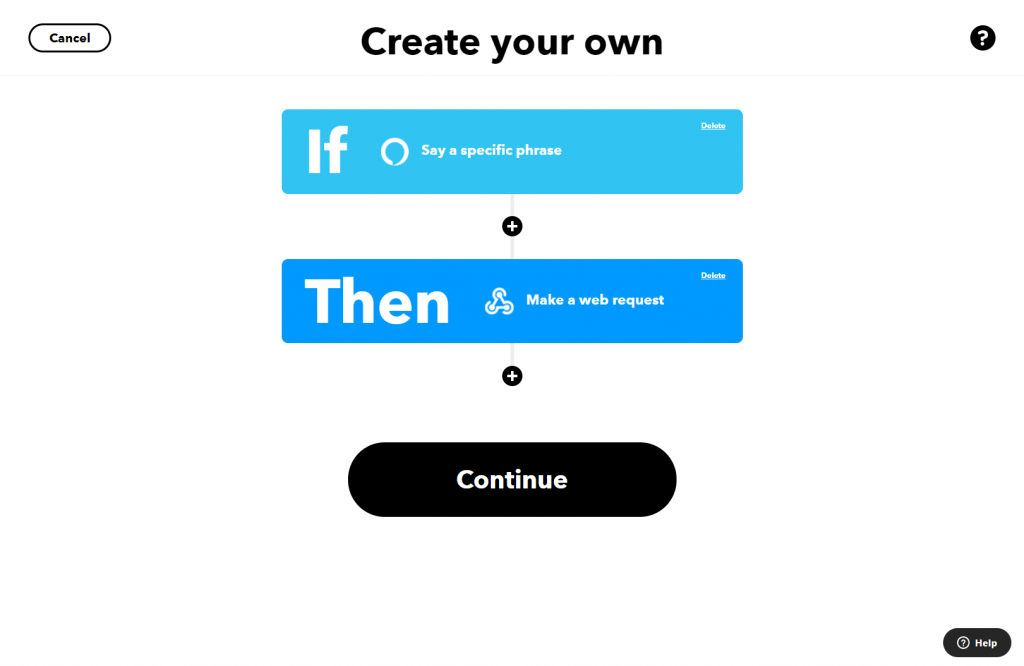
Open IFTTT.com login to your account and click on “Create”, then click on “If this Add” and Search for the “Amazon Alexa” service, click on the Alexa logo and then click on “Say a specific phrase”. This will allow you to specify something to say after “Alexa trigger….” that will basically execute the action we will configure.
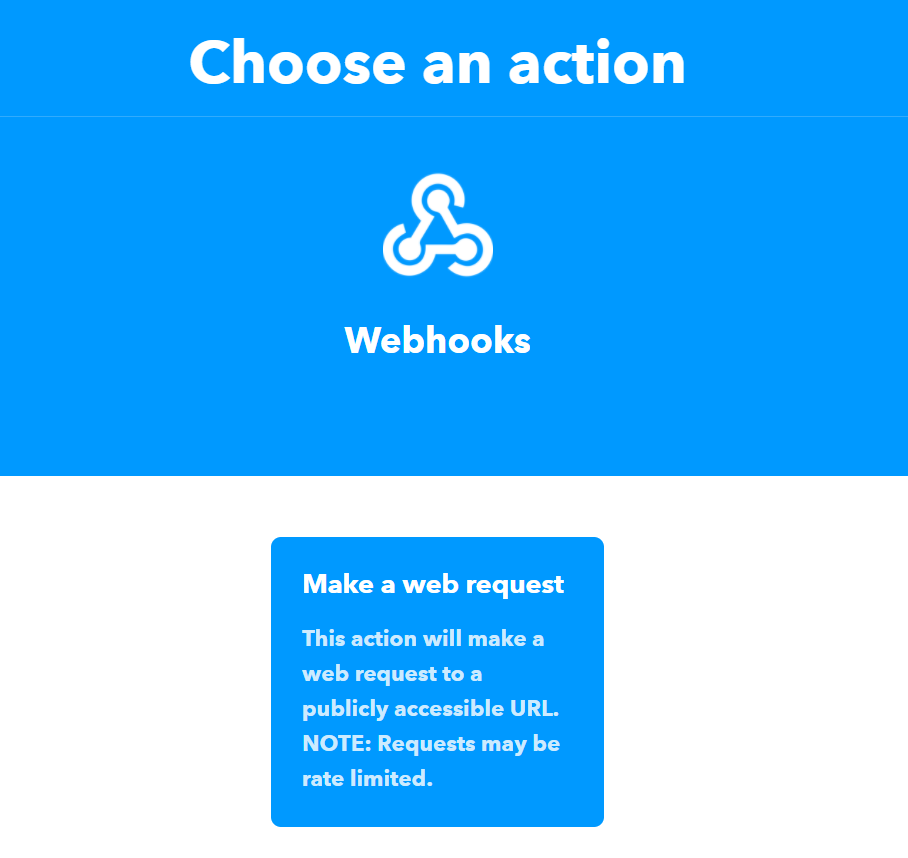
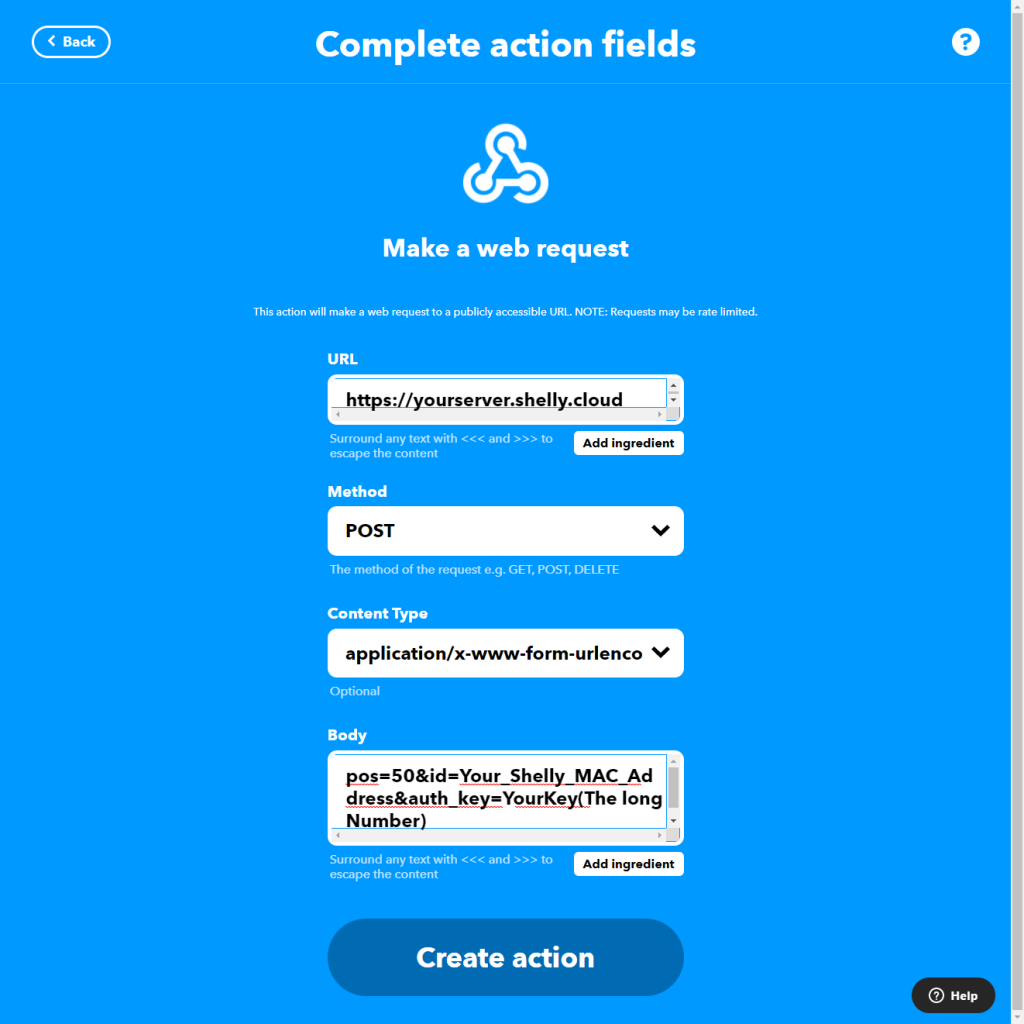
So, I am going to set the following phrase: “living room blinds 50 percent” and click on “Create Trigger“. Then we have to choose what happens when we say that phrase, we are going to click on “Then that Add” option and we are going to search for “Webhooks” click on it and then click on “Make a web request“. You will be presented with a form with several fields, complete them as follows:
– URL: https://yourserver.shelly.cloud (This should be the exact URL you were given when you obtained your Autihorisation Cloud Key).
– Method: POST.
– Content Type: Application/x-www-form-urlencoded
– Body: Here you need to define certain parameters and they should be all together separated by an “&”.
pos=50 (This will define the blinds to be at 50%). No matter their current state, you can play around with this % of course to fit your needs. Also if this doesn’t work well, make sure you have calibrated you Shelly on its own Web server under Settings and then under Positioning Controls.
id=YOUR SHELLY MAC ADDRESS, this is the one you got from Device Info menu.
auth_key=This is the Authorization key you obtained from Shelly.cloud together with the server URL you should use.
So the whole thing that should be pasted in the “Body” field of the IFTTT form we were configuring should look like:
pos=50&id=Your_Shelly_MAC_Address&auth_key=YourKey(The long Authorization number)
If you have more than one device that you want to control at the same time, I am checking with IFTTT and Shelly support how to achieve this, will update this post as soon as I have more details and tested something that works.
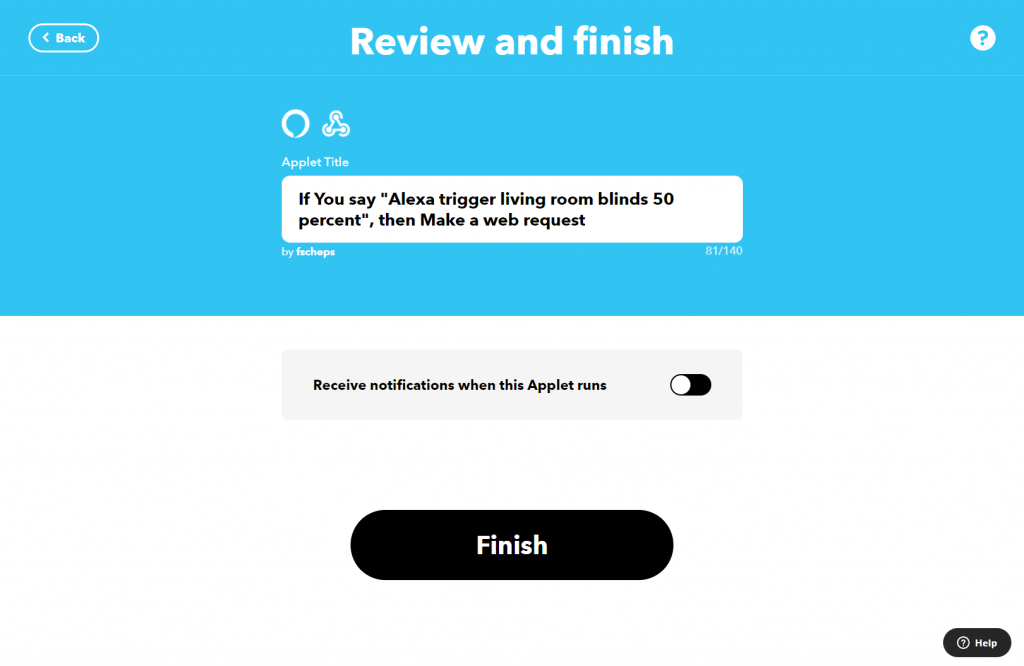
Once everything is configured click on “Create Action“. Then click on “Continue“, choose to change the name of the IFTTT Applet and click on “Finish” to save it. Once saved try it by giving Alexa the command “Alexa trigger Living Room Blinds 50 percent”, it should now set your blinds to the configured percentage.
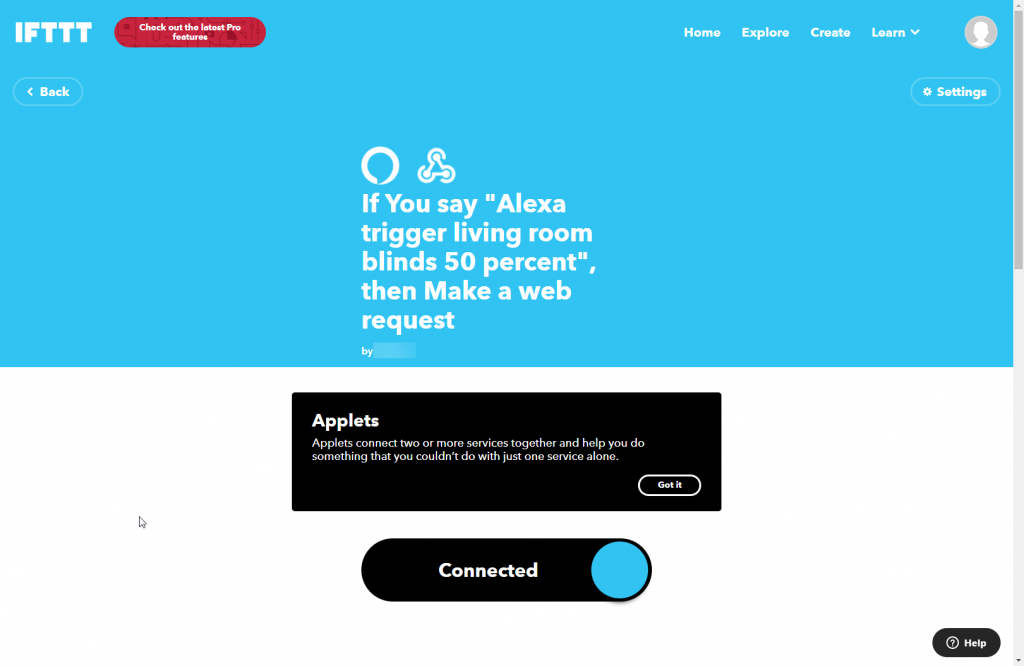
If you want to see the IFTTT step by step screens, have a look below, keep in mind I pay for a Pro account of IFTTT so the screens may vary a bit, but the principle should be the same (unless IFTTT decides to restrict the functionality of free accounts).

Conclusion
Now you can control your rolling blinds with Shelly and IFTTT or directly with the Alexa Skill (by saying the correct phrase). If you want to learn more you can find all the official Shelly API documentation on the following link (it was shared by Shelly support). Or you can go to their website under Knowledge Base > Developers > Cloud API.
Also if you want to learn more about what or how you can control your Shelly devices you can check this link about compatibility.
There are multiple use cases for the Shelly relays, and they have several type of devices which you can explore on their website. For the time being I am quite impressed with their functionalities and flexibility. Probably will write more about them in the near future.


Your post is very informative for us. Thank you.
I’ve taken your guidance and think I have everything set but I can’t get the applet to work, I keep getting an error:
Action failure message: Error: Error: getaddrinfo ENOTFOUND shelley-35-eu.shelly.cloud. Unable to make web request to https://shelley-35-eu.shelly.cloud/device/relay/roller/settings/topos
The address is from my Shelly app on Android phone and the …/device/relay… is from the api documentation, I noticed you didn’t use that bit in the example, so I tried it without that and it still failed
Is there another setting I need to apply perhaps, maybe setting something in HOSTS etc?
I am afraid I am a little lost with this one, but did you try on the Facebook Groups? The community is quite active over there.
Unfortunately, as of October 30, 2023, IFTTT no longer works with Alexa – a decision made by Amazon.
Amazon is dropping a lot of devices, not only IFTTT, they only want there own ecosystem, like ring but not google hello,etc…
Thats why it is dangerous to commit to a single brand that suddenly can go bankrupt or decide to stop supporting open protocols.
I sold my alexas